
My iOS to Mac screenshot workflow
I have long found it amusing that after all this time, messaging ones self a set of screenshots is still the most practical way to go about transferring them from iOS to OS X. For a while I had a better solution but we decided to stop working on Ember for iOS, so I went back to Messages.
After many years of this, I’ve finally come up with what I think is as close to a perfect workflow as I’m going to get. There are 3 parts to it: the iOS side, the middleman, and the Mac side. Not to worry though, two of them are handled automatically.
It all starts in the fantastic Workflow app that I only recently purchased to explore “its outstanding use of iOS accessibility features”. If you are unfamiliar with Workflow it is, in short, the most powerful automation tool currently available on iOS.
The middleman is unsurprisingly, Dropbox.
The Mac part of the workflow relies on Ember (get a free trial) and it’s auto-import feature. Full disclosure, it’s an app that we make.
Here’s a screen recording of the workflow in action (the Dropbox upload time will, naturally, vary depending on your connection speed):
If this looks like the sort of workflow that would work for you as well, here’s how to set it up.
Workflow
The action I use in Workflow is largely based on the “Upload Screenshots” action featured in the photos section of their built-in gallery. I’ve made the following changes to it:
- Under the “Save to Dropbox” option, I’ve set a specific “Destination Path”. Doing this means that it won’t prompt me to choose a folder every time I upload screenshots. The path I chose was
Apps/Workflow/Screenshots/but you can to set it to anywhere you want within your Dropbox. - I added a home screen icon specifically for this workflow. To do this, tap once on the action under “My Workflows” to edit it, then tap on the cog in the upper right hand corner. In the menu, tap “Add to Home Screen” and follow the instructions.
Rather than setting all of this up yourself, you can just download my action from here if you want (open that link on an iOS device to get an install prompt.)
Dropbox
You will be asked to setup Dropbox in Workflow. As long as you already have a Dropbox account there really isn’t much to do here.
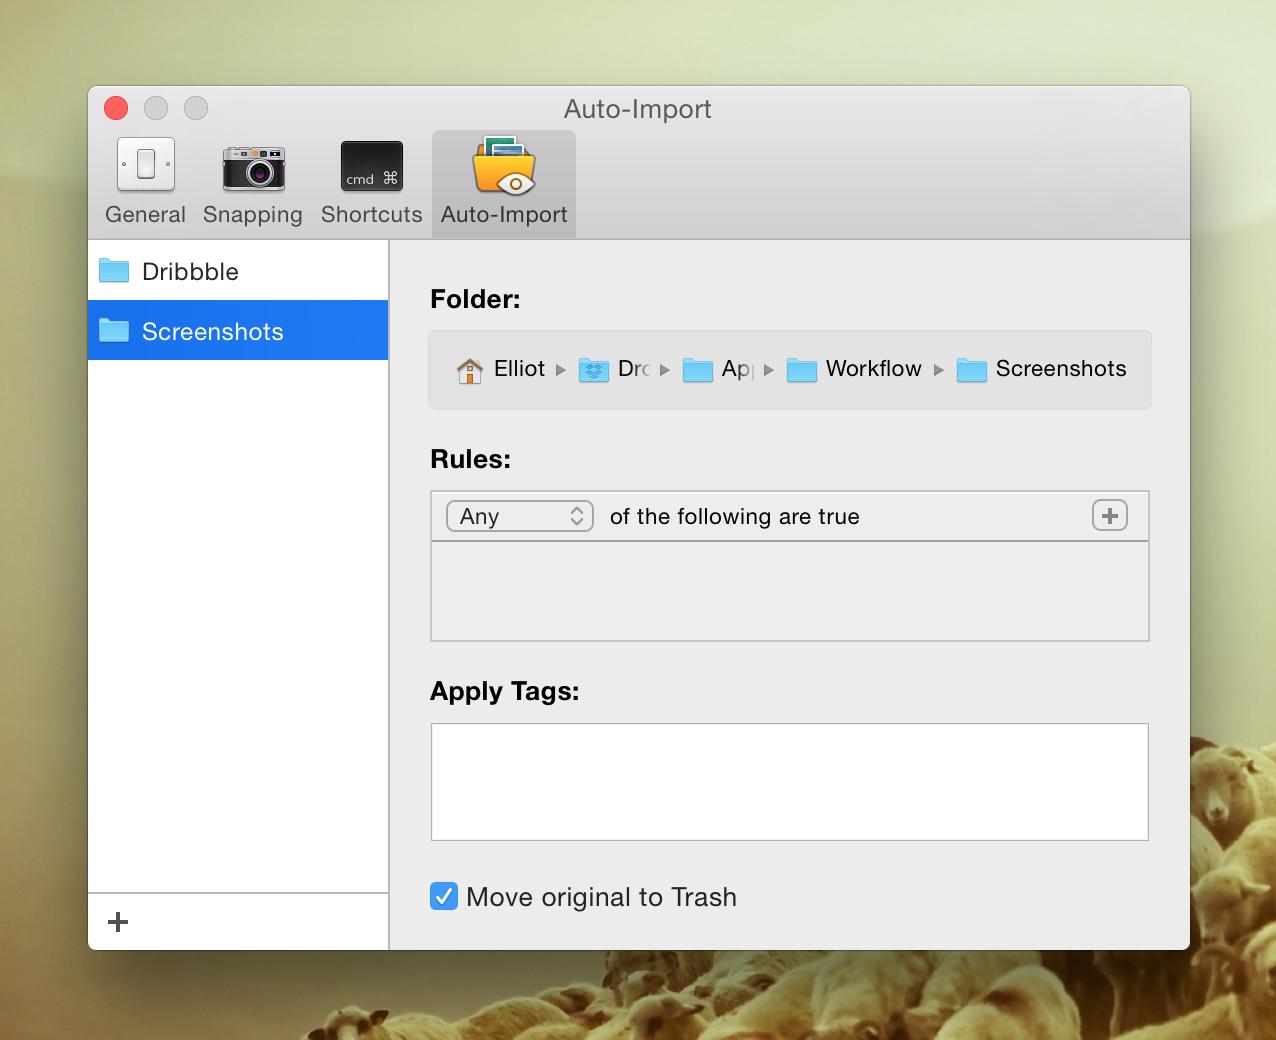
Ember
Open up Ember on your Mac and go to Preferences → Auto-Import. In the bottom left hand corner, click the ✚ icon and select the same folder you chose as your “Destination Path” back in the Workflow section. I like to have “Move original to Trash” turned on but that’s completely optional. The rest of the settings can be left as they are.
That’s it, you’re good to go. It’s worth noting that Workflow doesn’t always handle a large number screenshots well though. I’ve found it’s best to do them half a dozen or so at a time if you have a lot.
Parts of the app could, I think, be improved but overall I’m very impressed with Workflow. As someone who enjoys experimenting with automation, I’m sure I’ll have another action to share at some point in the future.